¶ Music Packs
"Music Packs" are resource packs containing music that will automatically be played depending on your current location in the server.
There is no official music pack, but anyone can create their own by following this tutorial. You are encouraged to share them in private if you wish to do so, though.
¶ Creating a Resource Pack
Before being able to add any soundtracks, we first need a basic resource pack you can load. To do this, we'll have to open the resource packs folder.
It can easily be reached by going into Options > Resource Packs and pressing the Open Pack Folder button. It should automatically open a folder named "resourcepacks".
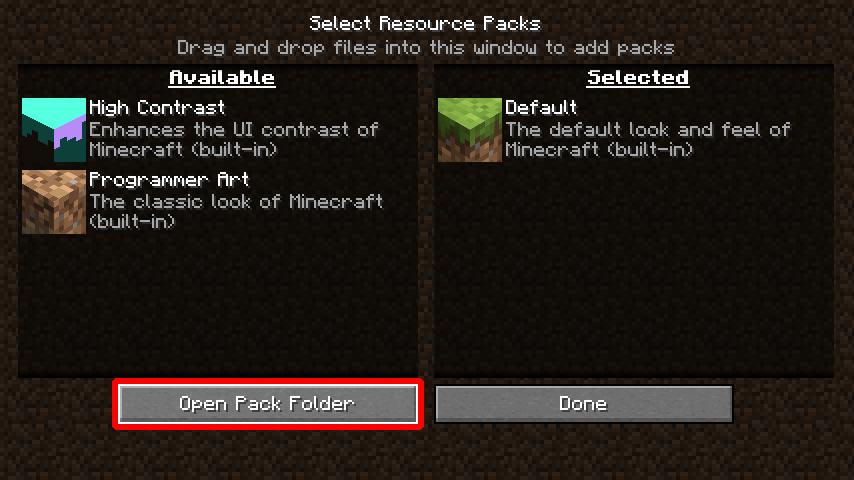
The button is outlined in red.
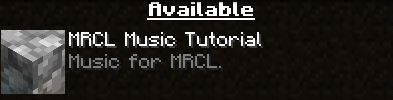
Once you have reached the folder, you must create another one within it. You can name it however you want, but it will be named “MRCL Music Tutorial” for the sake of this tutorial here. Open the folder you have created.
¶ pack.mcmeta
Inside, you will need to create a "pack.mcmeta" file. It handles settings such as the description of the pack and the version of Minecraft it is compatible with.
You can open the file with the text editor of your choice. As an example, you can use this template:
{
  "pack": {
    "pack_format": 64,
    "description": "Music for MRCL."
  }
}The “pack_format” key represents which version of Minecraft the resource pack is made for. 1.21.8 uses the number 64, and so it will be the one we shall use.
The “description” key is, as the name suggests, the description of the pack that will show up in the menu in Minecraft. You can replace it with whatever you see fit. Note that you can customize it through color codes, which are listed in the Customization page. You must use the "§" character instead of "&", however. (e.g "§4" for dark red)
Don't forget to save! You can now close the text editor. The resource pack should actually be visible in-game, now.
If you wish, you can add a picture for the pack by adding a “pack.png” file next to the “pack.mcmeta” one. Its dimensions must be a power of two. (e.g 64x64, 128x128 and so on.)

¶ Adding Music
Now that we have a resource pack you can load, it's time to actually add the music!
In the same folder you have the “pack.mcmeta” file in (and the “pack.png” file if you added one), create a new folder named “assets”. Inside that one, create yet another folder named “minecraft”. Once again, create another folder inside named “sounds”.
The path should now look like /assets/minecraft/sounds. (In this tutorial's case, MRCL Music Tutorial/assets/minecraft/sounds.)
All the music files go into the “sounds” folder. You can create new folders inside it to organize them as you wish. The tracks MUST be in “.ogg”!
Inside the “minecraft” folder but outside of the “sounds” one, you will now have to create a “sounds.json” file. You may open it with the text editor of your choice.
You can use this template:
{
	"music_id": {"sounds":[
		{"name":"file_path","stream":true}
	]}
}You must replace the “music_id” with the music identifier (also known as the “sound event”.) This is how Minecraft recognizes it. All the identifiers are listed in the Identifiers List below.
The “file_path” is the path to the file, minus its extension, with the “sounds” folder as the root. This means if you simply placed the file inside the “sounds” folder, the path will just be its name. However, if you added folders inside to organize it, they must be added to the path.
The “stream” parameter is used for music tracks to prevent lag, and it is highly recommended to not change it. You can see a list of parameters you can add to the sound in the Minecraft Wiki's explanation for the “sounds.json” file for those that want to go further.
You can add multiple sounds to the same identifier, allowing Minecraft to choose between different tracks randomly. There are no limits to how many sounds the same identifier can have.
Don't forget to add commas when adding new sounds to the same identifier or when adding a new identifier! A more developed "sounds.json" may look similar to this:
{
	"music_id": {"sounds":[
		{"name":"file_path","stream":true}, //Comma added here!
		{"name":"file_path2","stream":true} //No comma here. It's the last sound of the list.
	]}, //Comma added here!

	"music_id2": {"sounds":[
		{"name":"file_path3","stream":true} //No comma here. There are no other sounds.
	]} //No comma here. It's the last identifier in the file.
}The commas are very subtle and easy to miss, but if not set correctly, the entire pack may stop functioning.
Once again, don't forget to save! You can now try out your pack. The sound files will use the volume set for the “MRCL Music” slider (or simply “Music” outside of the server) in the Options > Music & Sounds settings.
Tip: You can press the F3 + T combination in-game to automatically reload your resource pack to quickly test out changes!
¶ Identifiers List
| Identifier | Usage | Identifier | Usage |
|---|---|---|---|
| lyoko_ice_music | Ice Sector | springmusic | Earth (Spring) |
| lyoko_desert_music | Desert Sector | summermusic | Earth (Summer) |
| lyoko_forest_music | Forest Sector | autumnmusic | Earth (Autumn) |
| lyoko_mountain_music | Mountain Sector | wintermusic | Earth (Winter) |
| lyoko_carthage_maze_music | Sector Five Maze | laboratory_room_music | Laboratory |
| lyoko_carthage_dome_music | Sector Five Celestial Dome | scanner_room_music | Scanners Room |
| lyoko_vcore_music | Shell Sector & Cortex | supercomputer_room_music | Supercomputer Room |
| replika_volcano_music | Volcano Replika | xana_void_music | XANA's Void |
| frontier_music | Frontier | ||
| tower_music | Tower Interior | ||
| network_neutral_music | Network | ||
| replika_nightmare_music | Nightmare Forest Sector | ||
| replika_taiga_music | Taiga Sector/Replika |